Wednesday, August 27, 2014

Daring Bakers'  August, 2014 Challenge: 
 Tubular and Coiled Treats: Kürtőskalács /Chimney cake and Ensaimada /Spanish Pastry


Kürtőskalács on left  and Ensaimada on right


The August Daring Bakers' Challenge took us for a spin! Swathi of Zesty South Indian 
Kitchen taught us to make rolled pastries inspired by Kurtoskalacs, a traditional 
Hungarian wedding pastry. These tasty yeasted delights gave us lots to celebrate!

I started the challenge by deciding to make just the Kurtoskalacs (chimney cakes) since they were the most visually dazzling and unusual. The preparation for the Kurtoskalacswas so easy  that I went for the Ensaimada as well. I stayed traditional for the Kurtoskalacs but played around with a filling for the Ensaimada. Hands down, the family loved the Kurtoskalacs best. I did not get to have a full panel of judges, though, because the family, well mainly my husband, ate everything but a few crumbs of Ensaimada. 
I think these pastries will be a great addition to the breakfast buffet at Thanksgiving. They look like a lot of work and expertise when really truly they are very easy. Also, they are light and flavorful. 
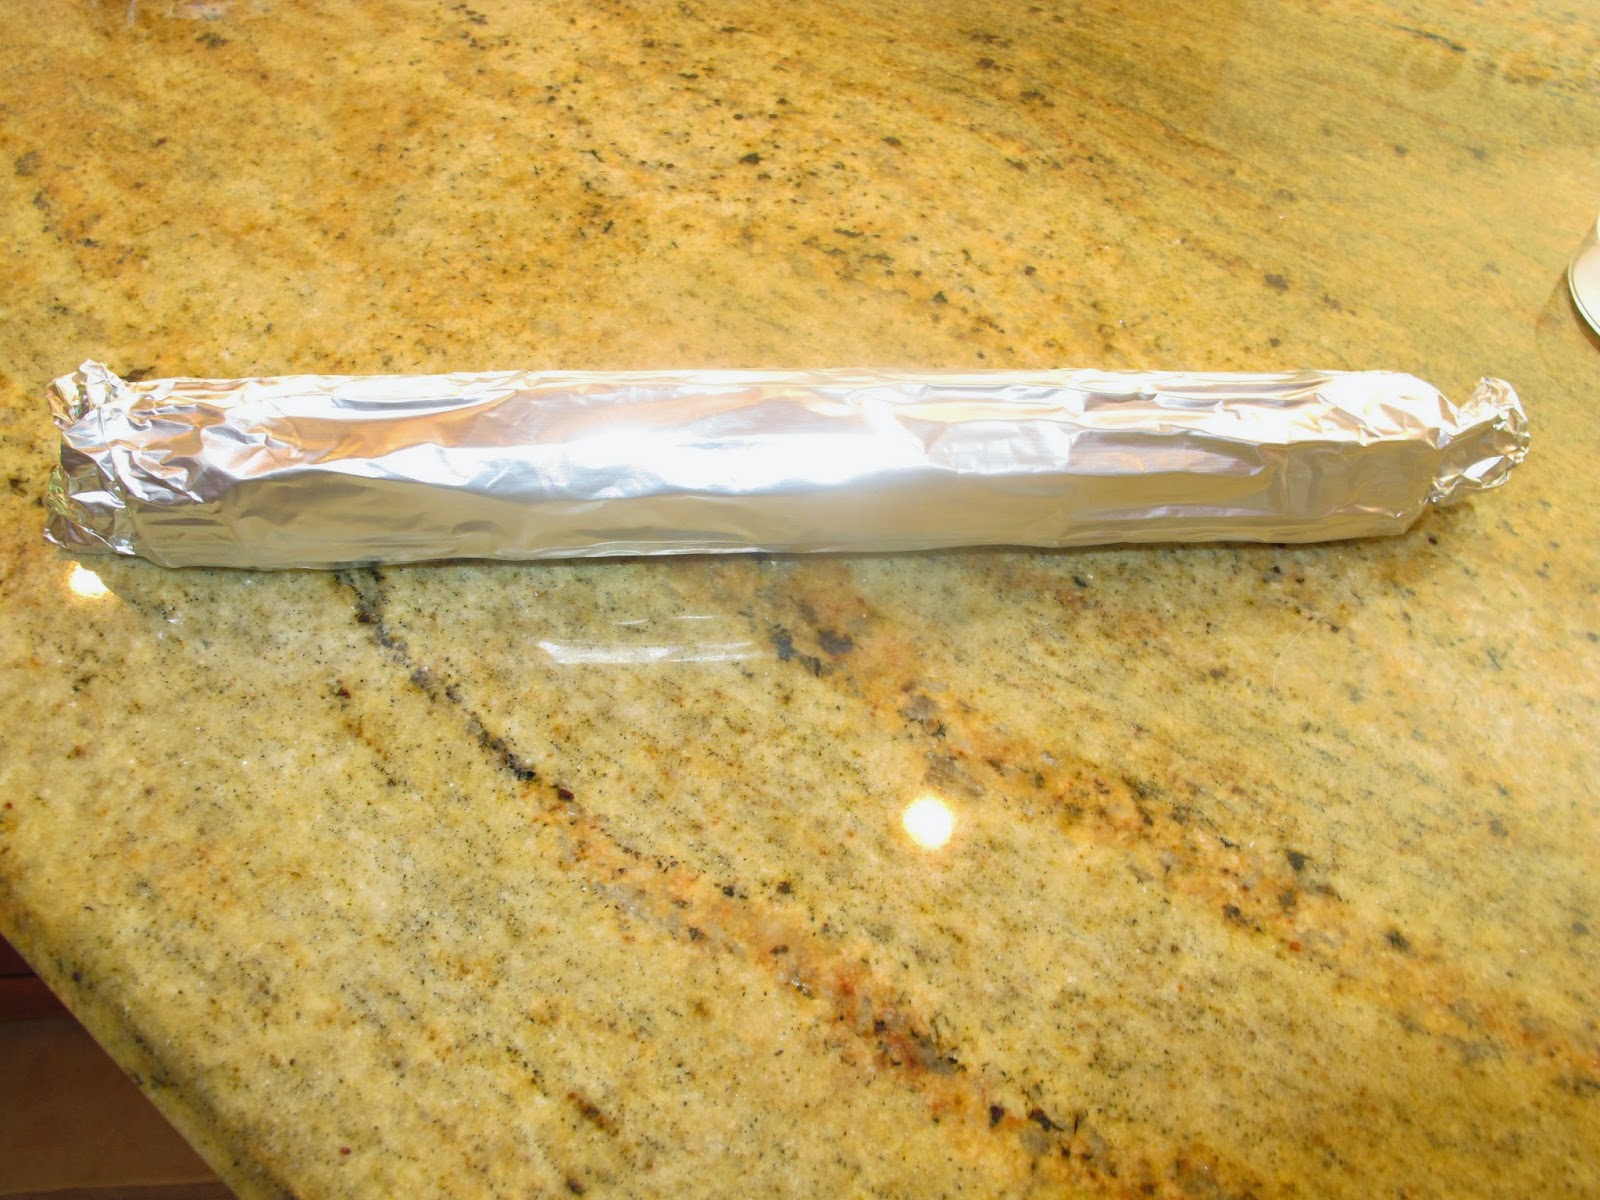
The hardest part of the whole thing was finding cylinders to wrap in foil for molding the chimney cakes. Read on to see what I found in my kitchen drawer...

Kurtoskalacs

Ingredients
 
For the dough:
2¼ teaspoons (1 packet) (7 gm) active dry yeast 
1/2 cup (120 ml) milk, lukewarm temperature
1¾ cups (8½ oz) (240 gm) all-purpose (plain) flour
2 tablespoons (1 oz)(30 gm) sugar
1/8 teaspoon (3/4 gm) salt
1 large egg, room temperature
3 tablespoons (1½ oz) (45 gm) melted butter
2 teaspoons (10 ml) (1/4 oz) (6 gm) sugar mixed with an 2 teaspoons (10 ml) (1/4 oz.) (6 gm) of spice ( I used pumpkin pie spice)

Directions:

Using active dry yeast, add ½ teaspoon sugar to lukewarm milk and set aside for 
5-10 minutes until it proofs (becomes foamy).
In a large bowl combine, flour, sugar and salt. To this add egg, milk, melted butter, and 
yeast.
 Stir the mixture until it comes together to form a dough, and then knead for about 
five minutes. Transfer to a well greased container.
 Allow the dough to rise for 60 minutes at room temperature until doubled in volume 
Prepare the rolling pins by covering them with aluminum foil, do at least two or three layers, to protect the pins from burning in the oven. I used a non stick foil so I did not have to grease the foiled covered pin. 
I used a sushi mat!


Punch down the dough and divide into 4 equal parts about 4 oz (115 gm) of each. 
On a well floured surface spread one portion of the dough Shape into 1/6 inch (4 mm) thick square-shaped sheet.Using a pizza cutter cut the dough into a long ribbons of about 1/2 inch (13 mm) wide.Wrap one end of the dough strip around the spit/rolling pin, tucking in the end so the dough doesn't unwind.

Keep the dough very thin (under ¼ inch (6 mm)) as you stretch and wind it on the rolling 
pun. Then roll the whole thing slightly on the counter top to flatten it/press it together. Brush with melted butter.  I sprinkled it with the pumpkin pie spice which was a mixture of ground cinnamon, ginger and allspice. 
Place in roasting pan and bake in a preheated moderately hot oven 375°F/190⁰ C/gas 
mark 5 for 25 minutes.
 
You may want to flip them halfway through cooking so they brown evenly.
Remove from oven and cool a few minutes til you can handle the pins.
Tap the mold on a table top to release the cake and set it up right to cool. I trimmed the bottoms slightly so they would stand upright.


Ensaimada

Dough
2½ cups (10½ oz) (300 gm) all-purpose (plain) flour
2¼ teaspoons (1 packet) (7 gm) active dry yeast OR 2 teaspoon instant yeast OR 14 gm (½ 
oz) fresh yeast
1/2 cup (120 ml) warm water
1 large egg
½ teaspoon (3 gm) salt
¼ cup (60 ml) (2 oz) (60 gm) granulated sugar
2 tablespoons (30 ml) olive oil
3 tablespoons (55 ml) (1 3/4 oz) (50 gm) butter, softened
3 tablespoons (55 ml) (1 3/4 oz) (50 gm) goat cheese, softened
2 tablespoons (1oz) (17 gm) fresh basil, chiffonade (thinly sliced)
Olive oil/canola oil for greasing bowl and work place.


Directions:
Using active dry yeast, add ½ teaspoon sugar add to lukewarm water and set 

aside for 5 minutes. To this add flour, salt and yeast mixture. Knead for 6 minutes if using kitchen aid mixer or 10 minutes by hand, until you get a soft and pliable dough. I had to add about 1/4 cup (60ml) more water to make a soft dough for this recipe.
Transfer the dough to a well greased bowl and covered with plastic wrap or covered with 
a cloth. Let rise for 2 hours or until the dough doubles in volume. Punch down the dough and divide into 4 equal parts and then shape into balls. Lightly oil the work place and place a ball of dough, using a rolling pin roll out the ball into a long thin rectangle about 12x4 inch (30x10 cm) piece. Divide your butter to 4 pieces. Place a butter portion on the rolled out dough and spread it into a thin layer.


Take pieces of dough between your fingers and try to gently stretch the dough to be even 
thinner and larger about 16x7 inches (40 x18 cm)Roll the dough from the long end to into a tube. Then roll the tube again into coil shape similar to a snail shell.


Make sure to keep the coil loose so that there is space in between the layers, this will help 
the dough to rise.
Repeat for the other three dough balls and butter portions. 
Place the snails onto a baking sheet lined with parchment paper. Slightly press the sides 
with your hand.Cover the baking sheet with a clean cloth and let rise for 1 hour. During the end of second rising, pre-heat oven to 180⁰ C/350⁰ F/Gas mark 4
Bake Ensaimadas for about 15-20 minutes. Watch them closely during the end of baking 
time. They should be golden brown in color.
When baked immediately place the Ensaimadas onto cooling racks. I then brushed a little melted butter on top and sprinkled with a coarse sea salt.

Friday, June 27, 2014

Daring Bakers Challenge June 2014 - Sweet Rolls


This month the Daring Bakers kept our creativity rolling with cinnamon bun inspired treats. Shelley from C Mom Cook dared us to create our own dough and fill it with any filling we wanted to craft tasty rolled treats, cinnamon not required! 

I was a bit ahead of the game on this one as I have spent the last couple of months working on a sourdough  cinnamon roll. I felt like, with this challenge, I would omit the cinnamon and go for something different. That's when I started dreaming about the orange rolls from The Club in Birmingham, Alabama.  My grandmother, Mimi, was a member of The Club ( pronounced Thee Club), a dancing and dining venue on top of a big hill overlooking downtown Birmingham.
 The Club was considered very luxurious and added to your cache if you belonged there,which of course needed mentioning to anyone who may not have been informed of the prized membership.
 I loved The Club for the food. Well maybe I did not love all the food...maybe just the orange rolls. They were super sweet and my grandmother would say they were more a dessert than a side bread. She said this while waiting for lunch to arrive and munching on them with sweet tea that was so sweet, it made your head hurt. My Mimi loved her sweets. I got to go to lunch with her each year when the doll show came to The Club. My grandmother loved looking at the antique and modern doll displays with their fancy dressings. She towed me along as the excuse to attend. I loved it too.
Let's get back to today though. I found a recipe online for the authentic The Club orange sweet rolls. They were easy to prepare and did not take much time. No one liked them...not even me. They were sickening sweet to me. We don't eat like that anymore and they just tasted like sugar. So, I started tweaking a bit. I halved the filling of coconut and sugar and whirled it in the food processor so it was finer textured. I increased the amount of liquid in the glaze as well as doubling the glaze.The recipe said that it made twelve rolls but I cut them so they made twenty four. They were smaller...cuter and popped right in the mouth.
The new version of orange rolls were a huge hit with family and co workers. I ate one just after the glaze set but still warm. The roll melted in my mouth yet I did not feel like I just ate one of the most decadent breads ever. These rolls are well worth the minimal effort. Make them fresh. I made a batch and formed the rolls leaving them in the fridge overnight. I gave the rolls about 30 minutes outside of the fridge before baking and they were delicious for breakfast.

 Here is my adapted version to what I am sure was an adapted version of The Club's Orange Sweet Rolls. I am not great with conversions for those of you outside of the U.S. but I gave it a big effort!


Orange Sweet Rolls


 - adapted from a recipe called The Club Sweet Rolls

1/4 ounce (6 gm.) dry yeast, 1 package
1/4 cup warm water, about 125 degrees
1/3 cup (60 ml) (2 oz) (50 gm) unsalted butter, melted
1 cup p (240 ml) (8 oz) (200 gm) sour cream
1/4 cup (60 ml) (2 oz) (50 gm) sugar
2 eggs
1 teaspoon (5 ml) (1/4 oz) salt
3 1/2 cups (840 ml) (12 oz) (450 gm) all-purpose flour
1/4 cup (60 ml) (2 oz) (50 gm) sugar
1/2 cup (120 ml) (4 oz) (100 gm) coconut, flaked
2 teaspoons (10 ml) orange rind, grated
2 tablespoons (30 ml) unsalted butter, melted
Glaze:
1 cup  (240 ml) (8 oz) (200 gm) confectioner's sugar
1 tablespoon (15 ml) orange rind, grated
3 tablespoons (45 ml) fresh squeezed orange juice


  1. Dissolve the yeast in warm water in a large bowl. Add the next five ingredients, mix well. Gradually stir in enough flour to make a soft dough. mix well.
  2.  Place dough in a greased bowl turning to grease the top.
  3.  Cover and let rise until double in bulk, about 90 minutes to 2 hours.
  4. Combine sugar, coconut and orange rind in a food processor and use the pulse feature to make a finer texture,set aside.(If you don't have a food processor, chop the flaked coconut a bit with a knife to make a finer texture.)
  5.  Punch down the dough. Knead until smooth and elastic on a floured surface.
  6.  Divide the dough in half. Roll each half into a rectangle(I rolled it to about 12 inches by 10 inches).
  7.  Brush the rectangle with melted butter. Sprinkle coconut and orange rind mixture over top. 
  8. Roll up from the long side. Cut into approximately 1 inch pieces (30 mm), turn on end and place in a greased pan. Cover with wax paper and let rise until doubled, about 30 minutes. 
  9. Bake in a preheated oven at 350°F/180°C/gas mark 4 degrees for about 20 minutes.
  10. Cool 5 minutes. Turn out onto a rack.
  11. While still warm, drizzle with glaze.


I like to use active dry yeast

Just throw the dough ingredients in a bowl!

I mixed with a dough hook on low speed for about 3 to 4 minutes.

Getting ready to rise!

The dough has arisen!!!!

Pulsing in the processor gives the rolls a finer filling texture.

Ready to roll!

Slathered in melted butter.

This smells amazing, by the way!

Ready for second rising..you can chill at this point for later baking.

Glaze in progress!

Fresh from the oven...only lightly browned!

Glistening with glaze

You know you want one!!!


Your turn to make them, Enjoy!


Tuesday, May 27, 2014

The Daring Bakers’ May, 2014 Challenge: Pão de Queijo


 This month's Daring Bakers' Challenge took us on a trip to beautiful Brazil! 
Renata of "Testado, Provado & Aprovado!" taught us how to make Pao De Queijo, tasty cheese buns that make the perfect snack or treat, and that will make your taste buds samba! The challenge this month was so fun and easy. I love all things cheese and that is exactly what this challenge delivered.
This time of year pulls me in all directions. I want to be in my basement studio creating sugar flowers. I want to be outside planting real flowers. I want to do it all. The Pao De Queijo did not tie me to the kitchen and made a quick delicious snack/meal if you could not eating them as I found out. I also found them yummy during cocktail hour with a  glass of Josh Cabernet Sauvignon.

On to the recipe. I am including a blurb about the Pao De Queijo from Renata for background information. She was very thorough in her explanations and I encourage you to visit her blog!! I used her traditional recipe and I loved it. Tapioca Starch was easy to find at my grocer as  gluten free choices become more mainstream.

Pão de Queijo ( Pão = Bread; Queijo = Cheese) is a non-yeasted bread, the main ingredient is not 
wheat flour instead it uses tapioca starch, but it is referred to as "bread". It dates back to the 
eighteenth century (I had to research that!) it became popular in the 1950's in Minas Gerais (a state of Brazil). You can find Pão de Queijo everywhere now in Brazil, from specialized snack bars that sell them hot out of the oven, to packages of frozen dough balls, sold in supermarkets, ready to bake at any minute in the comfort of your home. However, most Brazilians who like baking have a favorite recipe to make from scratch. I have tried a few dozen different recipes. Even if you stick to the same recipe, your Pão de Queijo may turn out slightly different each time, but always delicious! This is due to the quality of ingredients (tapioca starch varies from brand to brand) and type of cheese you use, don't be too concerned 'cause most cheeses will work fine.


TRADITIONAL PÃO DE QUEIJO 
Servings: 
Yields about 80 small balls 

Ingredients: 

500 gm (4 cups) tapioca starch (If you have access to sour tapioca, you can use 250gm (2 cups) of 
each) 
1 cup (250 ml) whole milk 
2-3/4 tablespoons (40 ml) (1½ oz) (40 gm) butter 
1 teaspoon (5 ml) (3 gm) salt (or to taste depending on how salty your cheese is) 
3 cups (750 ml) (9 oz) (250gm) Monterey Jack Cheese (or another cheese of your liking, or a mix of 
cheeses), coarsely grated I used Pepper Jack cheese- made it a bit spicy!
1 to 3 large eggs 


Directions: 

Heat milk, butter, and salt in a small sauce pan until it comes to a boil. Watch closely as it may boil over. Remove from heat and set aside. 
Sift tapioca starch into a large bowl. 
Pour the boiled (hot) mixture over the tapioca and start stirring with a fork. The milk mixture will not be enough to form a dough yet. You will have a lumpy mixture, that's what it is supposed to be. 
Keep stirring with the fork, breaking down the lumps as much as you can, until the mixture cools down to warm. 
At this point, preheat your oven to moderately hot 400° F/200° C/gs mark 6 
Add the grated cheese to the tapioca mixture and mix well, now using your hands. 
Add one egg at a time, mix with your hands until dough comes together. Renata suggests you lightly beat the egg with a fork and add little bits until the dough comes together into a soft but pliable dough. 
You only have to knead it a bit, not as much as you knead a yeasted bread. It´s OK if it is slightly sticky. I found that 2 eggs worked for me.
Form balls with the dough and place them on a baking sheet lined with parchment paper or silicon mat or lightly greased with vegetable oil. If necessary, you can oil your hands to make shaping easier.
The size of the balls may vary from small bite-sized balls to the size of ping pong balls. They will puff up quite a bit after baking. I made them on the small size, about 12 grams each.
Bake for about 25 minutes or until they just start to brown on the bottom. You may have golden spots of cheese on the crust. Don´t over-bake as they will get hard and bitter. 
NOTE: If your dough gets too soft and sticky to shape balls, you can always add a bit more tapioca 
starch or pop the dough into a piping bag and pipe the dough on a baking sheet. 
Serve hot or warm. 


Thursday, February 27, 2014

Daring Bakers Challenge - Beautiful Bread


Beauty surrounded the Daring Bakers this month as our host, Sawsan, of chef in disguise, challenged us to make beautiful, filled breads. Who knew breads could look as great as they taste?
February was such a cold month here in New England. I think it snowed every other day! I was thrilled to see a challenge that would get my oven turned on and warm up my kitchen. The challenge looked daunting on first sight but I have to say it was incredibly stress free and quick. Allowing the bread dough to rise was the only time consuming part. I made the dough in the morning, went off for a few errands leaving it to rise on top of my clothes dryer (the only warm place in the house) and then whipped up the bread in the afternoon.
 Thanks Sawsan for a wonderful challenge. I can say that many tasters of the breads asked for the recipes.  I preferred the Nutella filled bread over the cinnamon bread but I think that is because I waited a couple of days to taste the cinnamon bread and it does not keep well. I think if I had eaten it while a bit warm, I would have loved it. 
The Nutella bread was hands down addictive. Not only did the recipe make a large amount, it also kept for a few days with no great loss of flavor and texture. I will be making this one a lot. If you have not had Nutella, it is a hazelnut cocoa spread that is good enough to eat with a spoon from the jar, which of course I would NEVER do :)


Cinnamon Sweet Bread:

Ingredients

For the dough

1/4 cup (60 ml) warm water
3/4 cup (180 ml) warm milk
1 large egg
1/4 cup (60 ml) (60 gm) (2 oz) butter, softened
1/4 cup (60 ml) (50 gm) (1-3/4 oz) white sugar
1/2 teaspoon (3 gm) salt
3-1/4 cups (780 ml) (450 gm) (16 oz) plain (all-purpose) flour, approximately
2 teaspoons (10 ml) (8 gm) dry yeast
1/4 teaspoon (1 gm) cardamom, optional

For topping

1/4 cup (60 ml) of milk
1 tablespoon (15 gm) (1/2 oz) sugar

Between the layers

1/2 stick (4 tablespoons) (1/4 cup) (60 ml) (60 gm) (2 oz) butter
4 tablespoons (60 ml) (25 gm) (1 oz) cinnamon
1/2 cup (120 ml) (100 gm) (3-1/2 oz) sugar

For drizzling

1 can (400 gm) (14 oz) sweetened condensed milk

Directions:

1. In a bowl whisk the egg with milk, water, sugar, butter and yeast. Set aside
2. In another bowl sift the flour with the salt and the optional cardamom.
3. Add the liquid ingredients to the dry ingredients and knead until you get a smooth dough.


Note: This recipe requires between 3-1/4 and 3-1/2 cups of flour depending on the weather, humidity and the flour brand. Start with 3-1/4 cups and if you feel that the dough is too soft, add the extra 1/4 cup
4. Place the dough in a bowl you have brushed with some oil and cover it with a wet cloth and leave it in a warm place to double
(If you are tight on time you can heat your oven to 390°F/200°C then turn it off and place your dough in a glass bowl and place it in the warm oven with the wet cloth covering the bowl)


5. Turn the dough out onto a lightly floured surface
6. Divide the dough into 4 parts
7. Roll each part into a circle at least 20 cm (8 inch) in diameter


8. Brush the first layer with butter then sprinkle with sugar and cinnamon


9. Place the second layer on the first layer repeat the brushing and sprinkling and then do the same with the third layer.


10. Top with the fourth layer, this time only brush it with butter.


11. Using a knife make cuts that divide the dough circles into 8 triangles


12. Make cuts that go 2/3 of the way in the middle of each triangle. The cuts should not reach the base of the triangle nor the tip as you can see in the picture

13. Take the tip of each triangle and insert it into the cut you made and pull it from the underside


14. Arrange the triangles on your baking sheet


15. Pinch the two angles at the base of the triangle together
The end result will look like this

16. Brush the dough with milk

17. Allow to rest for 15 minutes during which you would heat your oven to very hot 500°F/240°C/gas mark 9 (rack in the middle). (Go for the hottest your oven will do).
18. Bake for 5 minutes on very hot 450°F/240°C/gas mark 9, then lower the temperature to moderately hot 400°F/200°C/gas mark 6 and bake for 15-20 more minutes
Note: ovens do differ greatly, so the time may differ,what you want is to bake it until the under side is golden brown and the bread is baked all the way to the center. If the top of the bread is not golden brown by that time and you have a broiler (grill) in your oven. Turn on the broiler (grill) for a couple of minutes until the bread is golden brown on top. If on the other hand the top is getting too dark, consider lowering the oven temperature and covering the top of the bread with foil to stop it from over browning
19. Take it out of the oven and allow to cool for 5 minutes then transfer to a wire rick and drizzle with sweetened condensed milk while it is still warm.


Cinnamon Bread just before drizzling the sweetened condensed milk


OK, now here is my favorite!!!!

Nutella Twists:


Servings:This dough recipe makes two loaves, 16 small pieces each

Ingredients

1 can (400 gm) (14 oz) sweetened condensed milk
3 large eggs
1 cup (240 ml) vegetable oil
1 cup (240 ml) warm water
3 teaspoons (15 ml) (12 gm) yeast
7 cups (1 kg) (2.2 lbs) all-purpose (plain) flour, approximately
Pinch of salt
Instead of the eggwash use
2 tablespoons (30 ml) (25 gm) (1 oz) milk powder
3 tablespoons (45 ml) lukewarm water
1teaspoon (5 ml) (5 gm) sugar
1/4 teaspoon (1 gm) instant coffee
For the filling
½ jar (200 gm) (7 oz) of nutella (or similar)


Directions:

1. Mix the condensed milk, yeast, oil, water, and eggs in the bowl of your mixer
2. Add the flour one cup at a time and knead using the kneading attachment or by hand till you get a soft dough
3. The dough will be slightly sticky due to the sweetened condensed milk, don’t worry once the dough rests it will have a wonderful consistency


4. Place the dough in a lightly oiled bowl, cover and allow to rest till it doubles in size


5. Punch down the dough and divide it into 2 parts. Wrap one part in a plastic bag and work with the other.

6. Divide the dough ball into 4 parts
7. Roll each part into a circle at least 20 cm (8 inch) in diameter


You can use a plate or any other round item as a template if you want your layers to be identical and uniform
8. Spread the Nutella (or similar filling) on the first layer
9. Place the second layer on top of the first and repeat


10. Top with the fourth layer, this time only brush it with butter.


Note:To help with the slippery Nutella, you can place the filled layers before cutting into the fridge for 20-30 minutes, this will help the nutella to firm up. That will make the cuts and twists easier.
11. Using a knife make cuts that divide the dough circles into 8 triangles starting at the center but don’t go all the way to the outer edge.


12. Then divide each triangle into two (2) . That gives you a total of 16 triangles
13. Gently lift the triangles one at a time and twist them


The end result will look like this, repeat for the other dough ball
14. Brush the dough with egg wash replacement ( I did not do this-I just brushed with more melted butter)

15. Allow to rest for 15 minutes during which you would heat your oven to very hot450°F/240°C/gas mark 9 (rack in the middle)
16. Bake for 5 minutes on very hot 4450°F/240°C/gas mark 9, then lower the temperature to moderately hot 400°F/200°C/gas mark 6 and bake for 15-20 more minutes
Note:ovens do differ greatly, so the time may differ,what you want is to bake it until the under side is golden brown and the bread is baked all the way to the center. If the top of the bread is not golden brown by that time and you have a broiler (grill) in your oven. Turn on the broiler (grill) for a couple of minutes until the bread is golden brown on top. If on the other hand the top is getting too dark, consider lowering the oven temperature and covering the top of the bread with foil to stop it from over browning

Storage Tips:

The dough for the cinnamon bread and the Nutella twists can be stored in the fridge for up to three days.
The bread, once baked can be stored in air tight container for 2-3 days at room temperature or in the fridge.